

Light Up Marquee Sign
A few months ago, I was asked to make a sign for a co-worker's birthday. The theme was Hollywood/movies.
After much thought, I decided to go with this light up marquee sign. I knew I could re-use it after the birthday celebration for my sporadic movie nights at the house.
The project started with a strand of globe string lights that I had leftover after our outdoor wedding. I got foam board and red poster board at the dollar store.
I started by cutting the inner rectangle with rounded corners out of the red poster board. This gave me the red frame for the main piece.

Light Up Marquee
From the red poster board scrap, I created the topper shape. I used gold acrylic craft paint to make the gold lines on the topper. (Hint, start with white paint or gesso, then paint with the gold metallic paint on top of that. It is easier to paint the gold over the white, than over the red.)
I traced my poster board topper onto an old scrap of foam board and cut it out with an exacto knife, using rubber cement to paste the two together.
I traced my poster board topper onto an old scrap of foam board and cut it out with an exacto knife, using rubber cement to paste the two together.

Light Up Marquee
Make sure to round the exterior corners on the main part of the foam board, on both the red poster board frame and on the foam board.
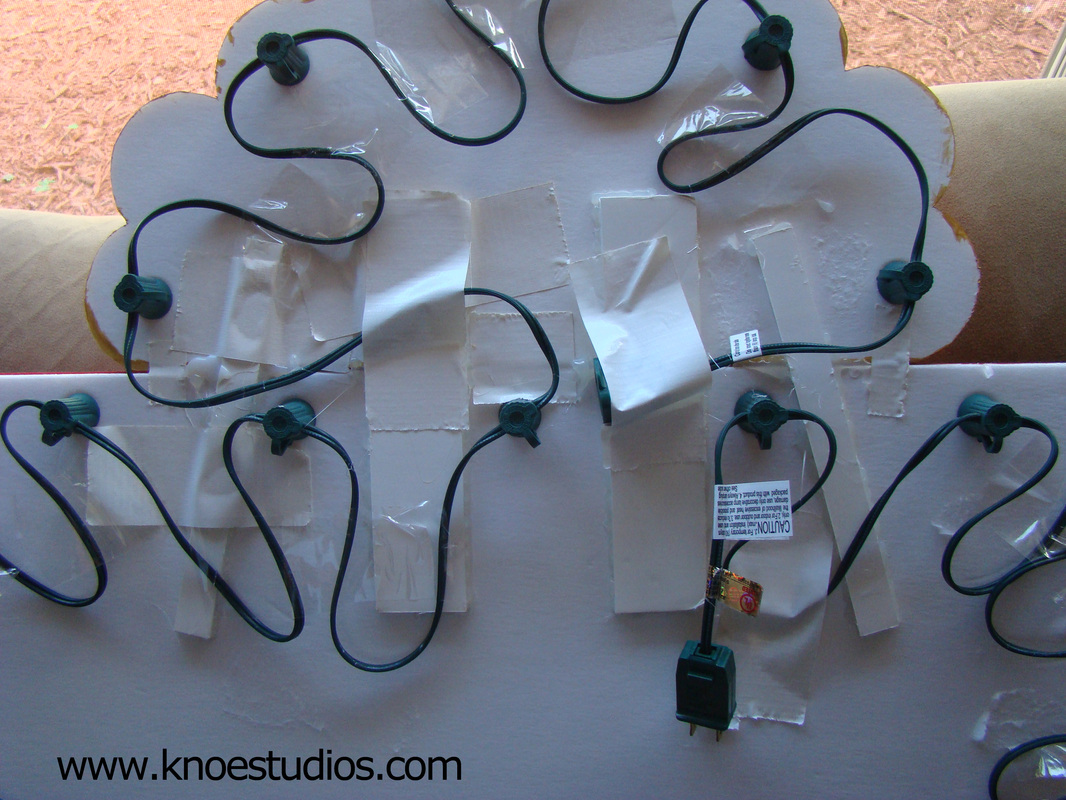
Before I glued the red frame onto the foam board, I put clear contact paper on the foam board. This provided a slicker surface that I knew I could remove tape from later, without damaging the surface of the foam board directly. Then, I used rubber cement to attach the red frame to the foam board.
Before I glued the red frame onto the foam board, I put clear contact paper on the foam board. This provided a slicker surface that I knew I could remove tape from later, without damaging the surface of the foam board directly. Then, I used rubber cement to attach the red frame to the foam board.
Light Up Marquee
I used scrap pieces of foam board to support and attach the topper to the main part of the sign. The scrap pieces are glued and taped onto the back of the sign.
Now, we're ready for the lights! I used a drill to make holes large enough for the stem of the bulbs to go through the foam board. I practiced drilling through the foam board on scrap pieces first. The size drill bit you use is dependent on the size of the bulb. Make sure there's not a lot of pressure on the bulb, and be careful not to break the glass.
Now, we're ready for the lights! I used a drill to make holes large enough for the stem of the bulbs to go through the foam board. I practiced drilling through the foam board on scrap pieces first. The size drill bit you use is dependent on the size of the bulb. Make sure there's not a lot of pressure on the bulb, and be careful not to break the glass.
Light Up Marquee
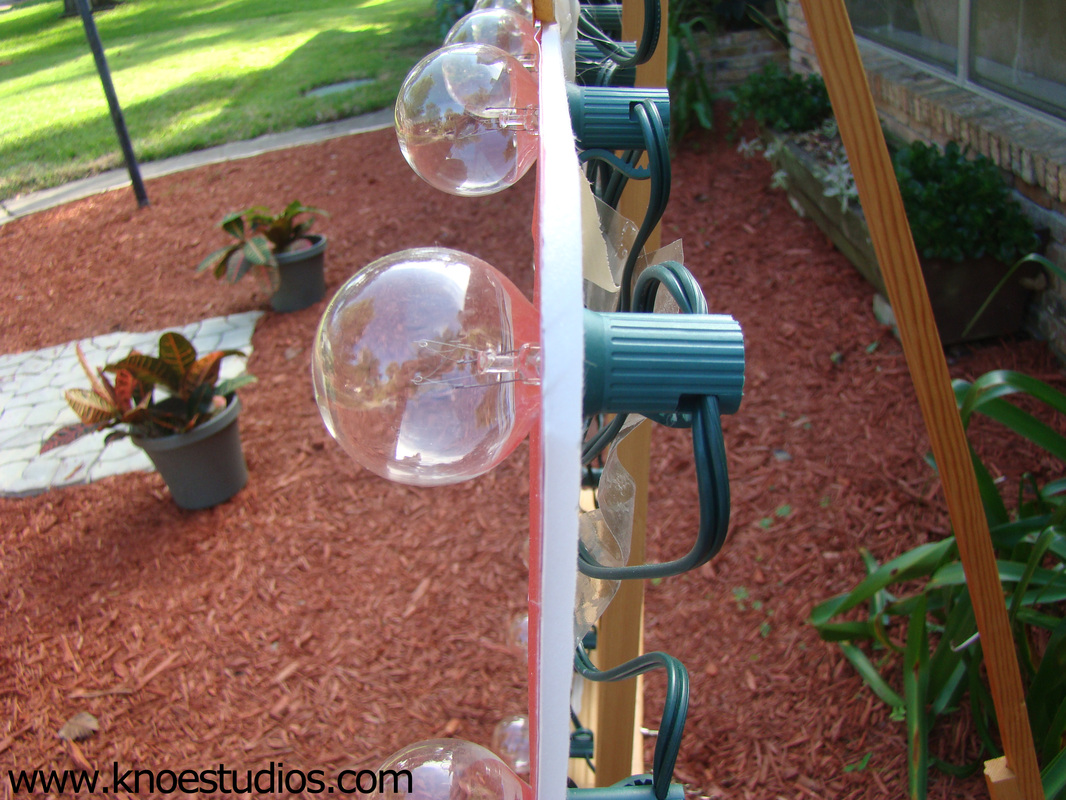
After determining what size drill bit to use, I marked where I wanted my bulbs, and drilled away! (Be careful at this point to not rip the poster board, as that could easily happen.) Once all the holes are drilled, put your bulbs on the front, and attach the bulb receptacle on the back. This will hold the bulb in place.
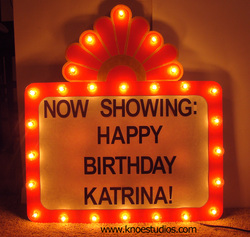
To create the words, I printed out the letters I needed in a large Arial narrow font. I cut out each letter separately, and simply taped it onto the sign. When I want to change the words, all I need to do is remove the current letters (the tape will remove easily from the contact paper) and add new letters.
To create the words, I printed out the letters I needed in a large Arial narrow font. I cut out each letter separately, and simply taped it onto the sign. When I want to change the words, all I need to do is remove the current letters (the tape will remove easily from the contact paper) and add new letters.
Light Up Marquee sign
To make sure the sign is safe, I always attach the cord to a timer, so it never stays on too long. Don't forget, heat and paper is not a great combination and be safe with your sign!

 RSS Feed