
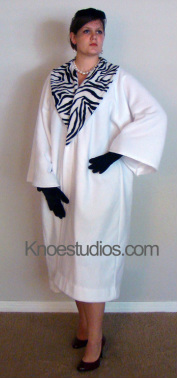
Faux fur coat by Emily Knoe
Recently, I had the opportunity to make this faux fur coat for someone. Since they only needed it for one day, now it's mine!
You see, we had a movie themed party at work, and we chose the movie 101 Dalmatians. This coat was made for Cruella Deville!
Keep reading to see how I made it . . .
You see, we had a movie themed party at work, and we chose the movie 101 Dalmatians. This coat was made for Cruella Deville!
Keep reading to see how I made it . . .
Inspiration
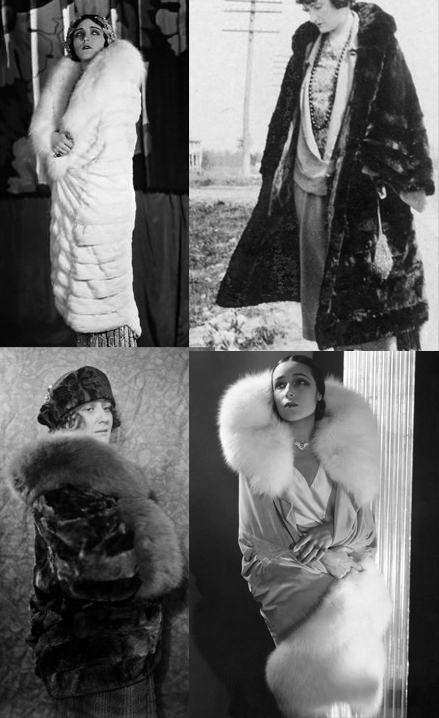
Fur coat inspiration
I wanted the coat to have a very vintage feel, like these examples from the 1920's. I wanted it to be oversized and flowing, and with a large statement collar. I love the way these old coats look, and if I was trying to recreate an everyday-wear coat, I would have put more effort into re-creating the horizontal fur lines. But since this coat is just for costume/dress up time, then that extra effort won't be needed.
Draping
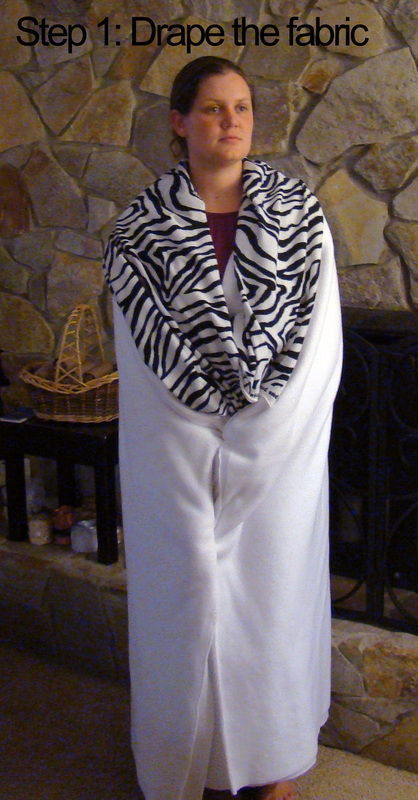
Making a faux fur coat
I started with 3 yards of white fleece and a long scrap of soft zebra patterned fabric.
Whenever I'm going to make something without a pattern, I drape the fabric on myself to get a good idea of how I want the finished item to look. The white fleece is folded in half for this picture. And, the zebra fabric is just laying on my shoulders.
Doing this should give you a good idea of how the fabric will lay and whether or not the type of fabric is appropriate for how you'd like to use it. For example, the zebra fabric was a thinner fleece than the solid white fabric. Because of this, I knew it would never work as a collar without some support. It was at this point that I decided to back the zebra fabric with white fleece, to give it a better shape.
Making the Body of the Coat
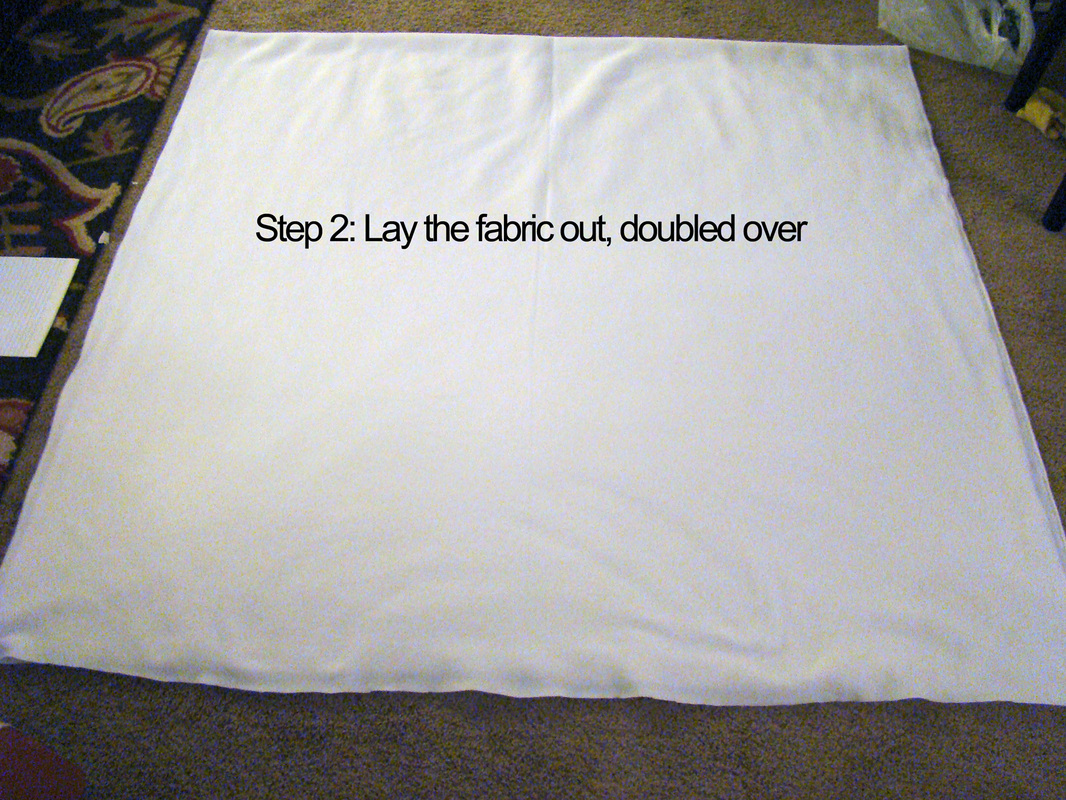
Making a faux fur coat
This begins exactly like the Pirate Coat I made in the past. This is also based on the "Felt Wee-Folk" coats in Sally Mavor's book, like the Pirate Coat was.
I laid out the white fleece, folded in half. The folded edge is where the shoulders will be on the finished product.
I laid out the white fleece, folded in half. The folded edge is where the shoulders will be on the finished product.
Making a faux fur coat
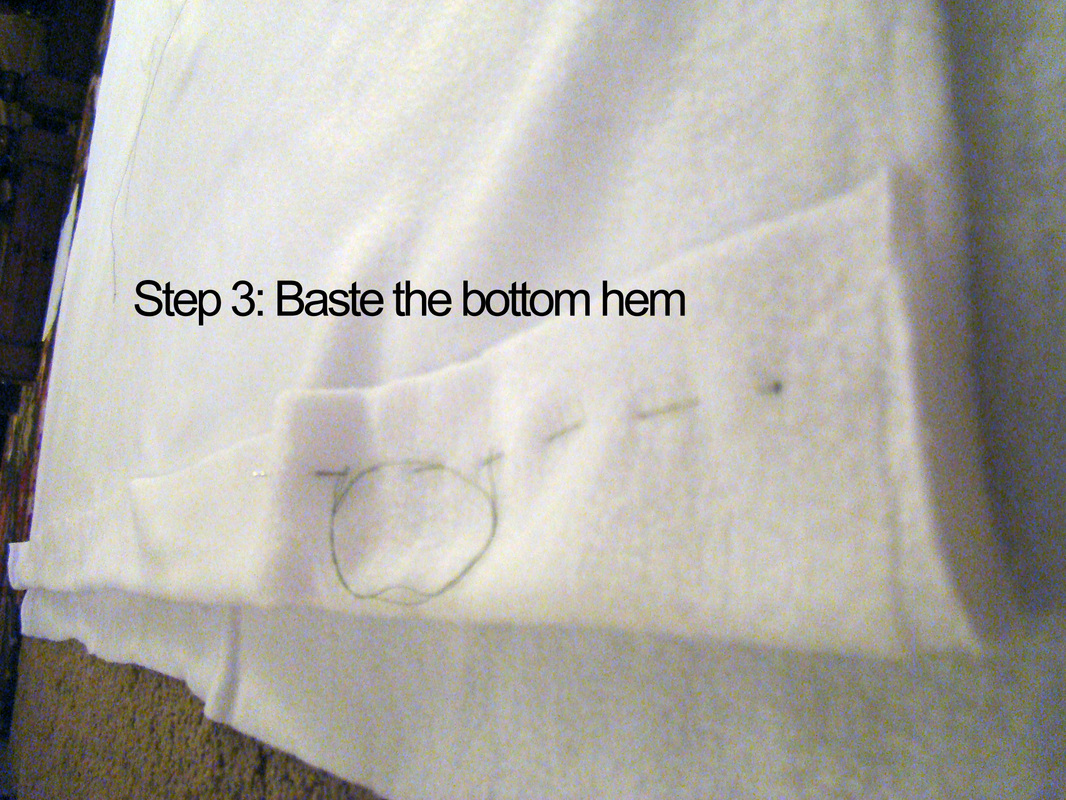
I basted the bottom hem on one side. The other side was later trimmed about a foot, so that I could use the scrap as a base for the collar. A basting stitch is just used to tack the hem, and a contrasting color thread is best, as it will make it easier to see when you remove this stitch later.
Making a faux fur coat
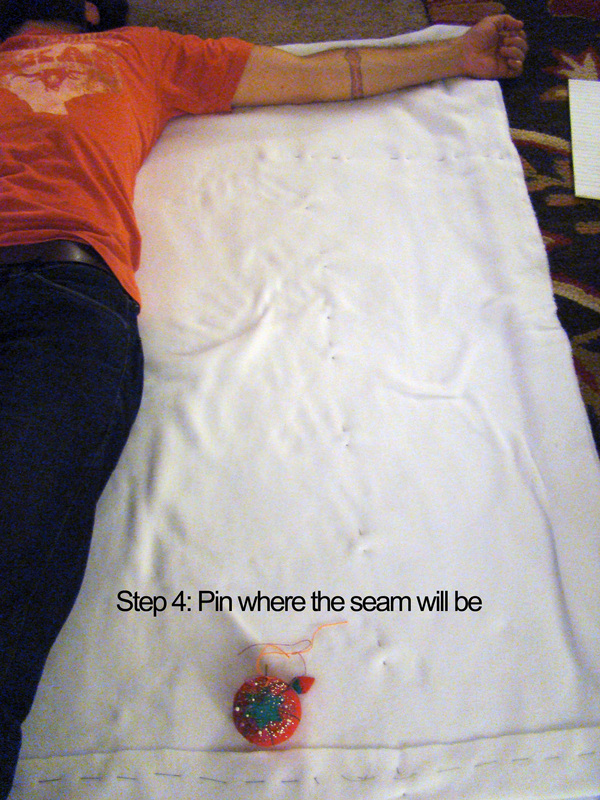
Have someone (or yourself) lay down exactly in the middle and use them as a basic human shape, on which to judge the placement of your side seams. Use straight pins or baste the side seam. A lot of width was added in this case, and the sleeves were given a bell/kimono shape at first. I later changed the sleeves to less of a bell/kimono shape, opting instead to keep them wide for most of the length.
Making a faux fur coat
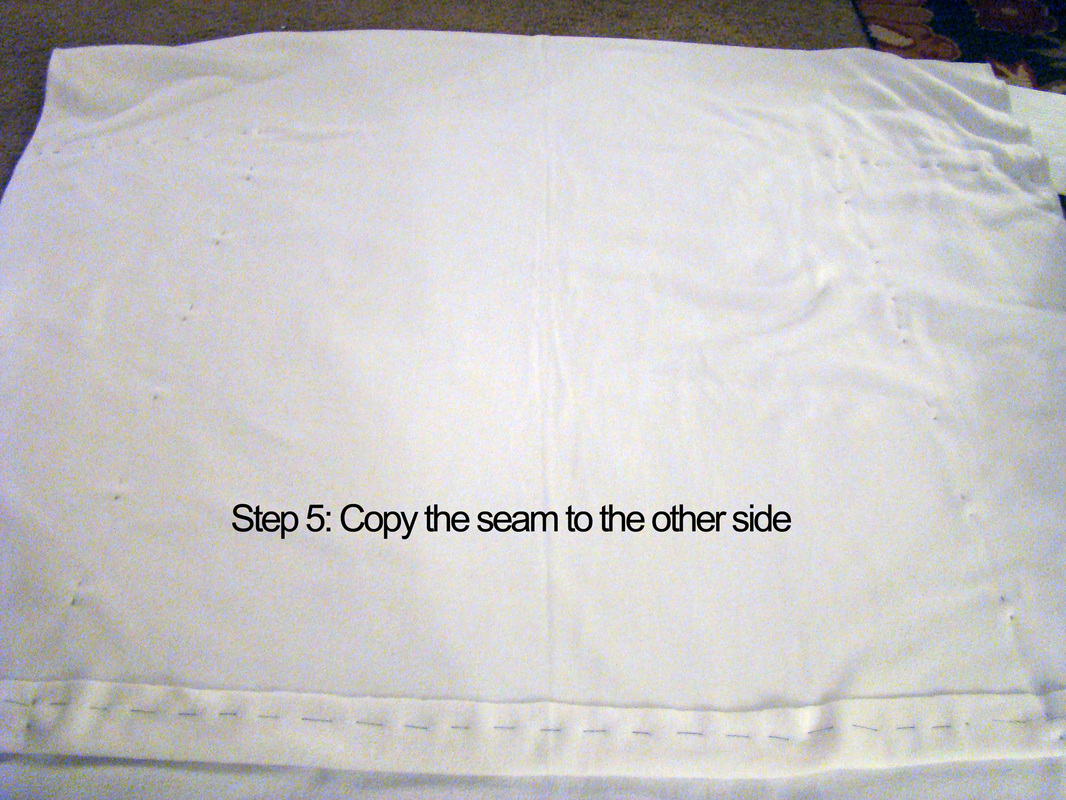
Fold the fabric from right to left, and copy the seam placement to the other side. you'll want these to match as perfectly as possible, so the coat won't look asymmetrical.

Making a faux fur coat
Cut the middle opening and a very small neck hole. You don't need to make the neck hole big enough for a head to go through, since the front opening allows for that.

Making a faux fur coat
Keeping the fabric in it's inside out position, try on the fit. In this photo, I had already turned in the front opening seam to see how it would fit. It was definitely big enough in the middle and the sleeves, just like I wanted. Notice the length in the back? That was because I needed to have some extra to cut off, to add to the collar.
Once I deemed the fit right, I machine stitched the two sides, changing the sleeve a bit, as I mentioned earlier.
Once I deemed the fit right, I machine stitched the two sides, changing the sleeve a bit, as I mentioned earlier.
Making the Collar

Making a faux fur coat
Next, I used the long scrap of white fleece, and folded it in half. I created this curved shape that corresponds to half a collar. Then I used the sewing machine to stitch the short side on the left.
Making a faux fur coat
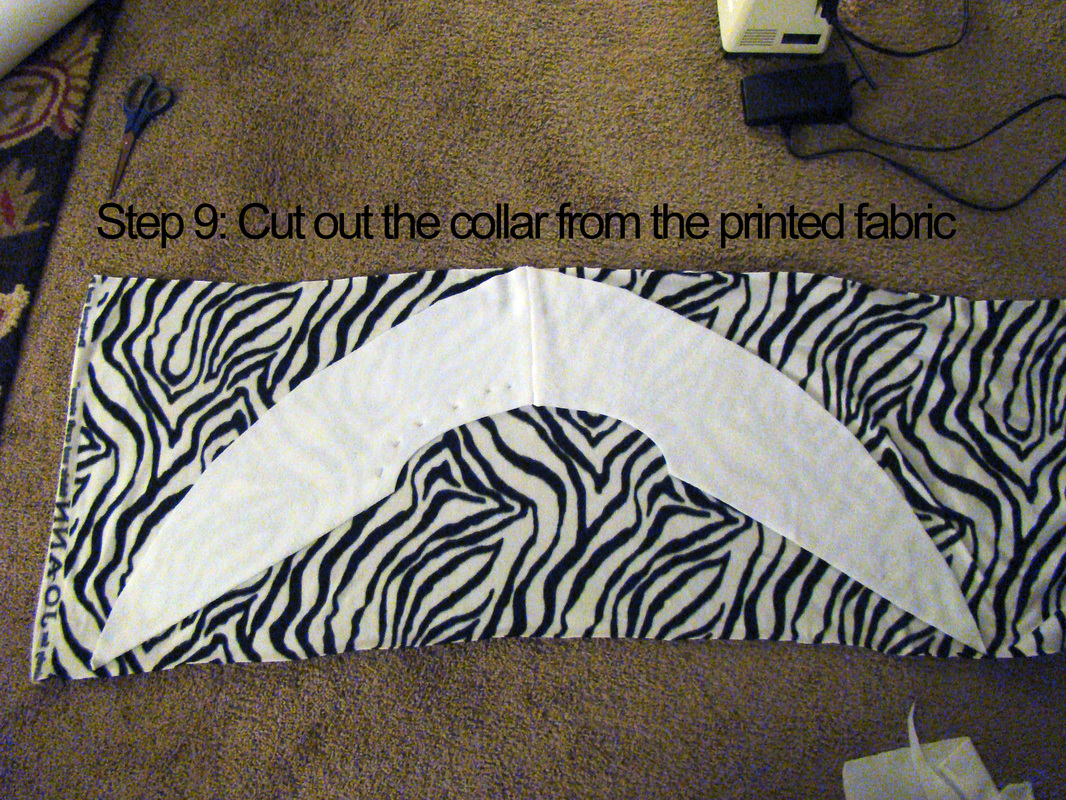
I now had a full collar shape of white fleece. And, I laid it on the zebra fabric to trace the shape. I cut out the zebra print and sewed along the big, outside curve. Remember, sew with the "right" sides together.
Making a faux fur coat
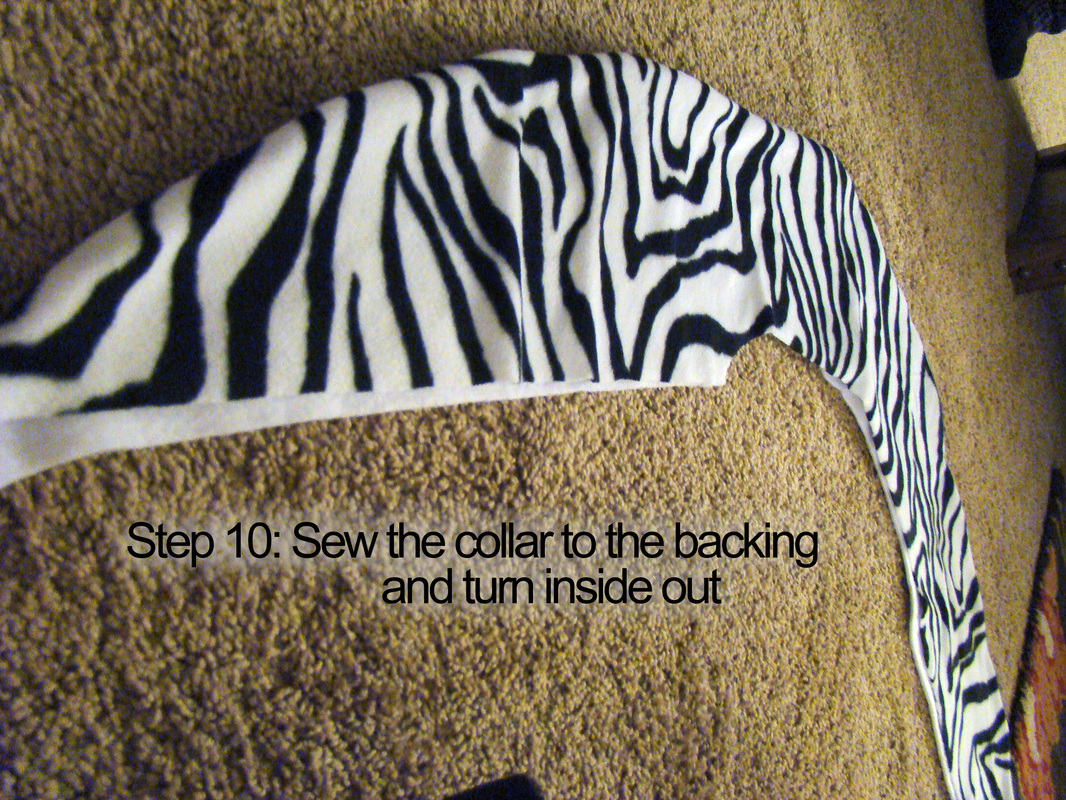
Turn the collar piece right-side out, to see how it looks. After I did this, I attempted to attach it to the body of the coat. I was having a lot of trouble, so I decided to go ahead and stitch the two remaining straight edges, leaving only the neck curve un-stitched.

Making a faux fur coat
Dry fit the collar to the coat. Victor was a great help during this part, being my mannequin, while I pinned the collar in place. When I sewed the collar on, I sandwiched the extra fabric, at the back of the neck, into the opening between the two collar pieces. Then I stitched the two sides down the front with a blind whip stitch.
Making a faux fur coat
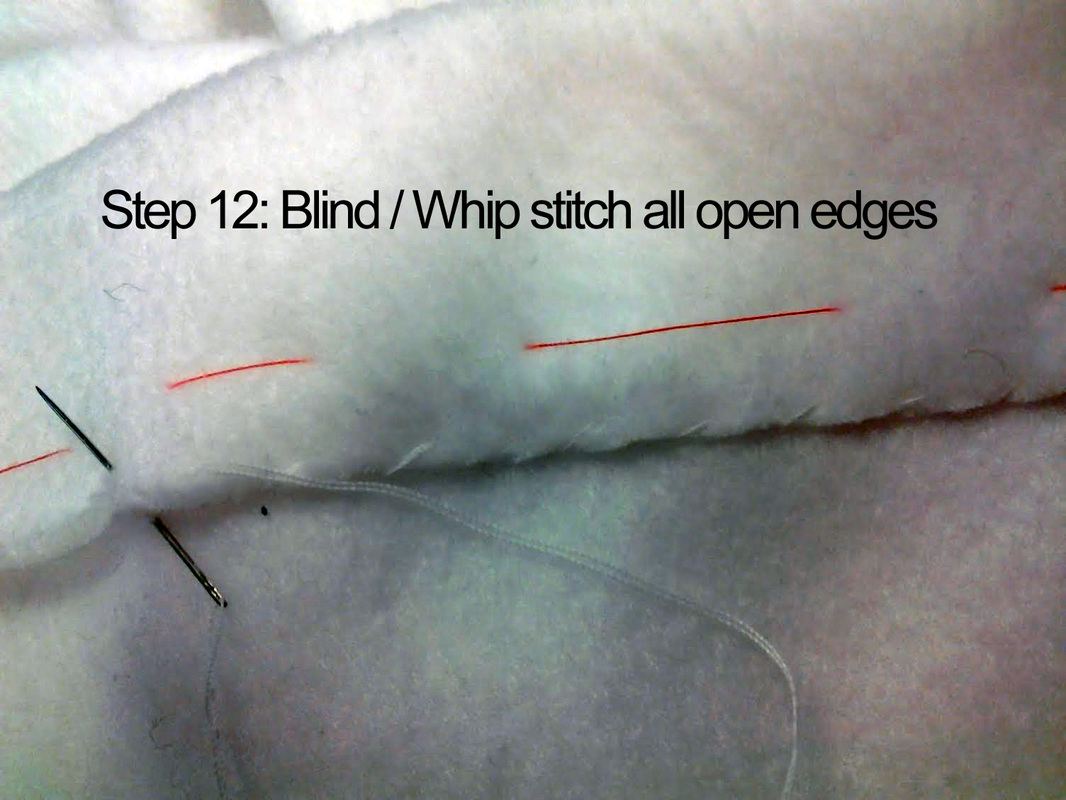
Lastly, I secured all the hems and seams that I had previously basted. Here, you can see how I blind / whip stitched the open edges. The goal is to not have the stitch visible on the outside of the coat. I do this by only grabbing about one thread of the outside facing fabric when I whip stitch. On a material like fleece, the fluff is enough to hide a stitch that small with no problem, but even on a cotton blend, this technique works rather well to create a blind stitch.
Also, note that I brought in a good inch and a half into all my edges, to give them some semblance of weight, like a real fur would have.
Also, note that I brought in a good inch and a half into all my edges, to give them some semblance of weight, like a real fur would have.
Finished!

Even though the design is simple, the coat comes out looking elegant and refined! Most importantly, I had a lot of fun making it, and I'll have even more fun coming up with reasons to wear it.

 RSS Feed